Imagery Format Problem Fixes and Workarounds
Some users experience problems using the latest imagery products provided by UGRC. This including the HRO from 2012 and NAIP from 2009, 2011, 2014, and 2016. Users affected are typically working on one of the following software platforms:
- MicroStation
- AutoCAD
- Manifold
- Apple Preview
- Photoshop
- Microsoft Picture Manager
Common Issues
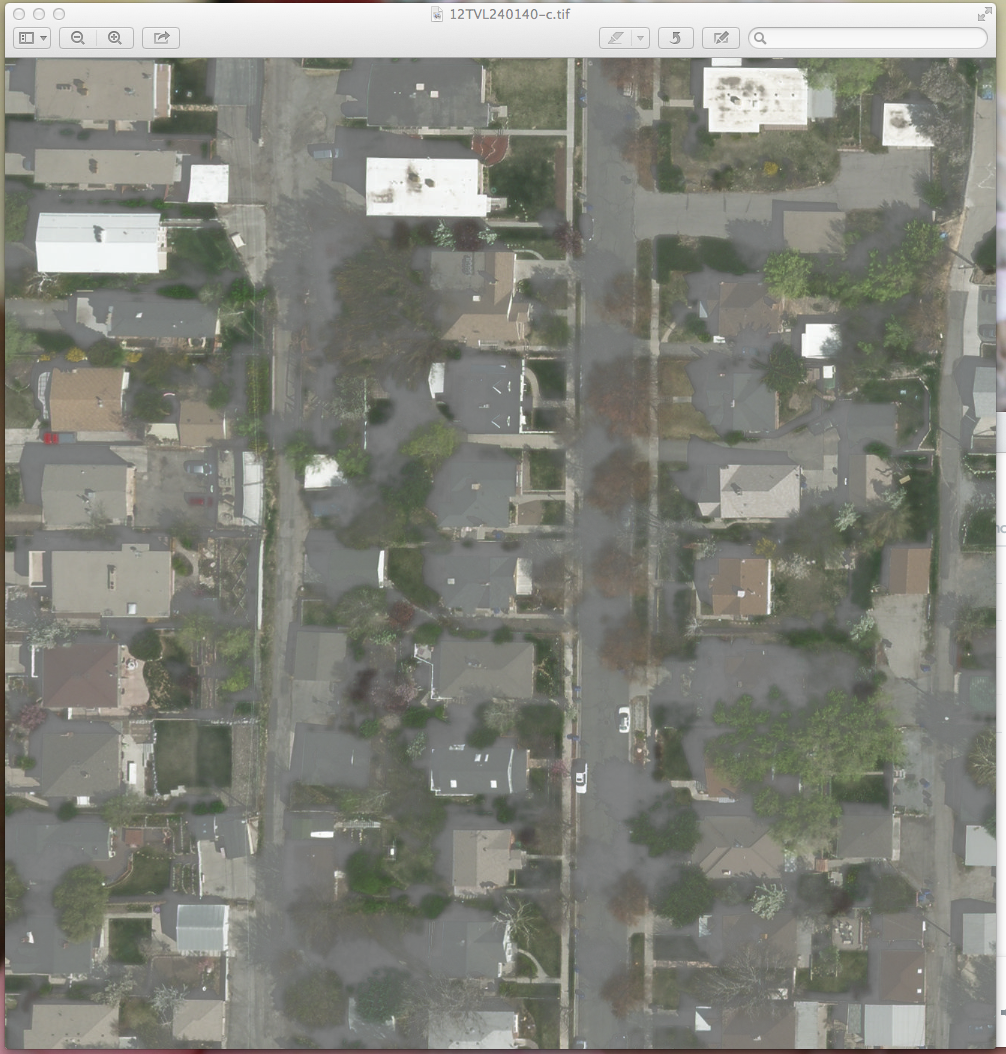
Washedout or Unrecognized Images
4-Band Imagery: The imagery products contain 4-bands of imagery (Infrared, Red, Green, Blue) as opposed to the standard 3-band color imagery (Red, Green, Blue) most are familiar with. The new imagery can, and most software platforms default to, display as a natural color image. In some cases the 4th band of imagery is not recognized by the software and is either displayed with the other 3-bands of imagery giving an odd washedout appearance. Other software platforms may not recognize the imagery at all.
Solutions
- Use the ArcMap tool
Composite Bands (Data Management)to convert the image to a different format. Specify the bands to use for the output file. Instead of adding the.tifimage to the tool addBand_1,Band_2, andBand_3as the Input Rasters. (ex.C:\HRO \12SVK240260.tif\Band_1,C:\HRO \12SVK240260.tif\Band_2,C:\HRO \12SVK240260.tif\Band_3) - Use the ArcMap tool
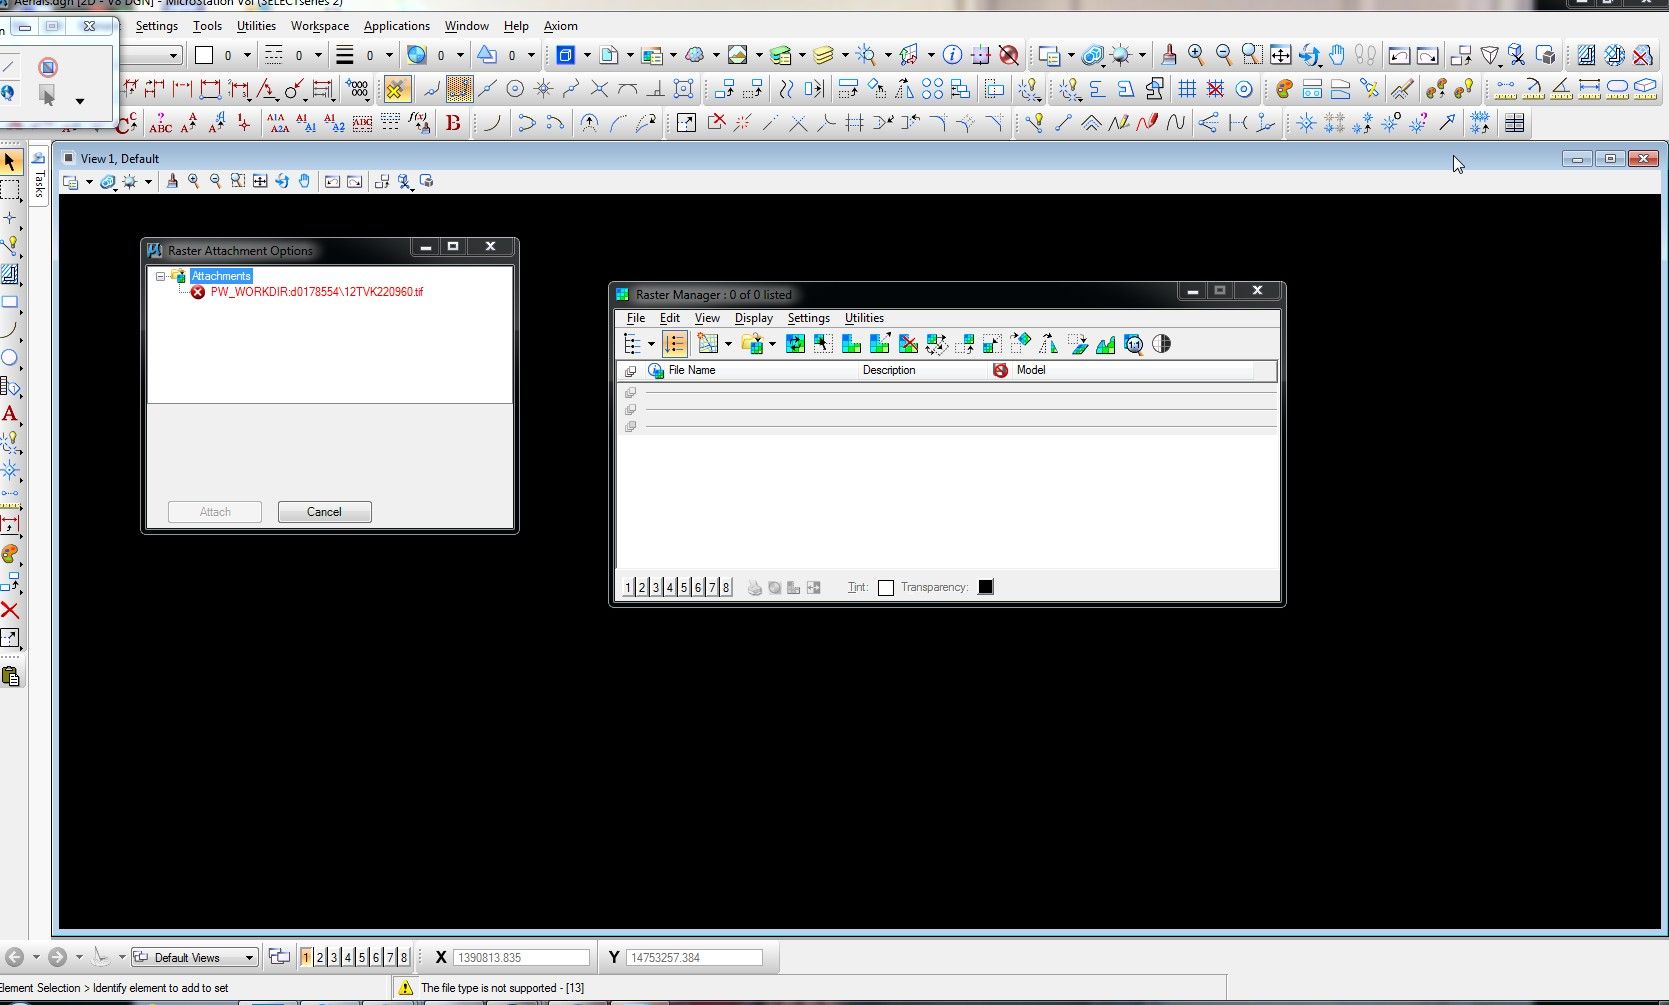
Raster To Other Format (Conversion)to convert the image to a different format. - Microstation users should convert the 4-band images into 3-band images and use the Raster Manager to add the new 3-band images. (see FWTools example 1 below)
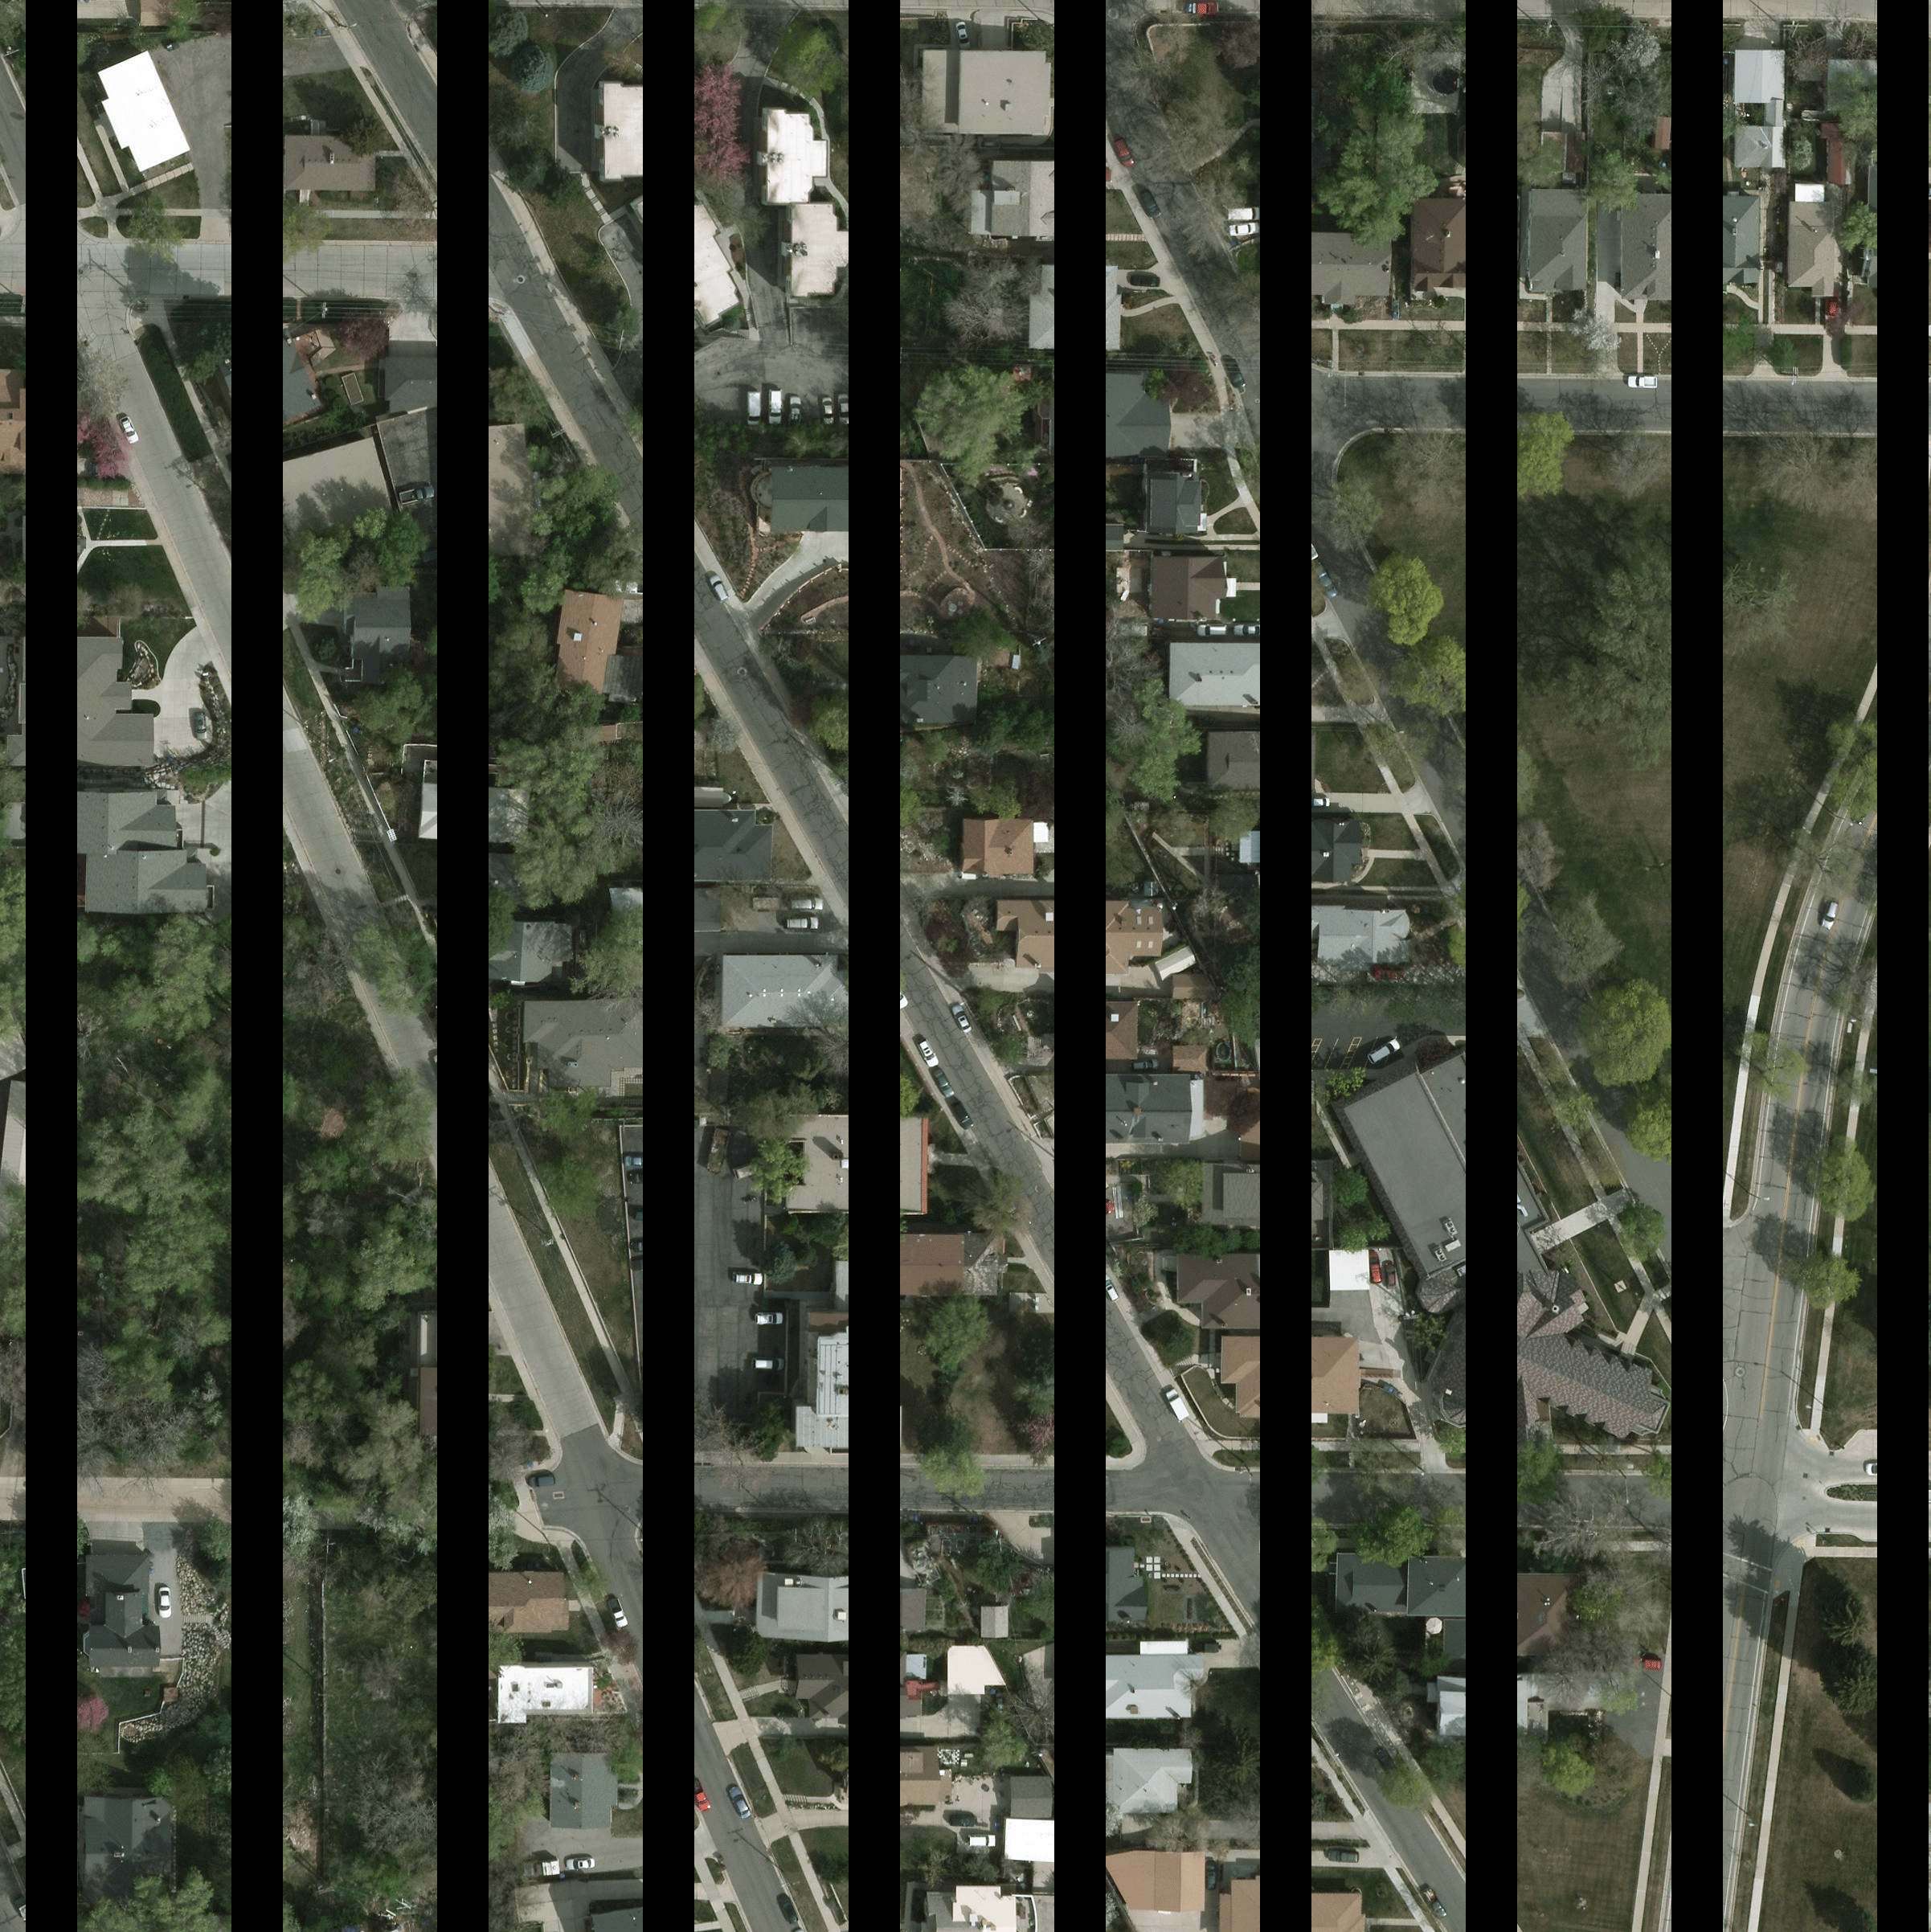
Striping or Artifacts
Compression: The imagery is compressed from its native TIFF format to a JPEG in TIFF compression utilizing the YCbCr color space. The TIFF 6.0 format is widely implemented however some older software versions and even some new ones do not have the capability to utilize this format. This can cause images to be improperly displayed with stripes or other artifacts.
Solutions
- Download the free image viewer IrfanViewServer and save the image to a
jpgformat. - Download the free FWTools toolkit and decompress the TIFF. (see FWTools example 2 below)
FWTools
After downloading the latest version of the software, add the FWTools executable to your path. Use the path to the bin directory eg: C:\Program Files (x86)\FWTools2.4.7\bin\.
There is a GUI for the toolkit but it is preferred to use the FWTool gdal_translate.exe in a command line window. To open the command prompt, Windows users should click Start then type cmd and hit enter or click to open.
Convert from 4 to 3 bands
At the command prompt you can use the following code example to convert the 4-band images to 3-band images.
Syntax gdal_translate.exe -of Gtiff -b 1 -b 2 -b 3 -co "Compress=JPEG" -co "JPEG_QUALITY=75" -co "Tiled=YES" -co "PHOTOMETRIC=YCBCR" -co "TFW=YES" InImagePathandName OutImagePathandName
Example 1 gdal_translate.exe -of Gtiff -b 1 -b 2 -b 3 -co "Compress=JPEG" -co "JPEG_QUALITY=75" -co "Tiled=YES" -co "PHOTOMETRIC=YCBCR" -co "TFW=YES" C:\HRO\12TVL080740.tif C:\HRO\new\12TVL080740.tif
Decompress TIFF
At the command prompt you can use the following code example to uncompress the imagery, remove the JPEG in TIFF compression with the YCbCr color space, and convert the 4-band images to 3-band images. Be aware that the uncompressed file sizes can be very large. For instance, a 175mb HRO2012 TIFF will uncompress to around 750mb.
Syntax gdal_translate.exe -of Gtiff -b 1 -b 2 -b 3 -co "Compress=NONE" -co "TFW=YES" InImagePathandName OutImagePathandName
Example 2 gdal_translate.exe -of Gtiff -b 1 -b 2 -b 3 -co "Compress=NONE" -co "TFW=YES" C:\HRO\12TVL080740.tif C:\HRO\new\12TVL080740.tif